Recently, I
have been made aware on a forum for ultraviolet photography (http://www.ultravioletphotography.com)
that the colours in my UV-photos are not “balanced”. I had noticed that before,
but I was not sure why I could not remove the colour-cast by white-balancing with
a PTFE (Polytetrafluoroethylene) target. My solution was
to convert the images to black and white, since we do not see UV-light anyway,
and therefore there is no “right” colour or set of colours for it.
All digital
cameras (unless they are monochromatic) have a set of RGB filters in front of
the individual light collecting pixels. The dyes in these filters are not equal
in terms of UV-transmission. In the case of my Panasonic Lumix G1 it looks like
the blue channel collects the highest amount of UV-light, followed by the red
channel, while the green channel is usually the darkest. Phrased differently, the
green dye seems to absorb the highest amount of UV-light and the blue channel seems
to have the lowest absorption. So, in order to get images without a strong
colour cast, the blue and the red channels are down-regulated and the green channel
is boosted. In my camera this can be done by setting the white balance manually
against a PTFE target.
However,
since I use to shoot in RAW-format I was hit by the fact that Photoshop
Lightroom (ACR) does not allow the values for the white balance to fall out of
a certain range. Therefore, my final images looked always different from the
previews on the rear screen of my camera. Using the DNG-profile-editor (http://wwwimages.adobe.com/www.adobe.com/content/dam/Adobe/en/products/photoshop/pdfs/cs6/DNGProfile_EditorDocumentation.pdf)
can change that behaviour by creating a custom profile, as I learned in an
Adobe forum. After creating a suitable profile I was able to reproduce colours
similar to those described here:
I’m going
to show my UV-photos using this profile in the future, mainly for aesthetic
reasons. However, these “UV-colours” should not be confused with “bee-colours”,
since here we have just a small part of the spectrum that the eyes of bees can detect
displayed in the colours that we know. In one of my next posts I’m going to
elaborate more on “bee- colours”, today I will show mainly some UV-shots and
the colours they can produce in a modified digital camera.
First a Spring
Cinquefoil (Potentilla
neumanniana) in visible light:
Now the UV-photo of the same flowers:
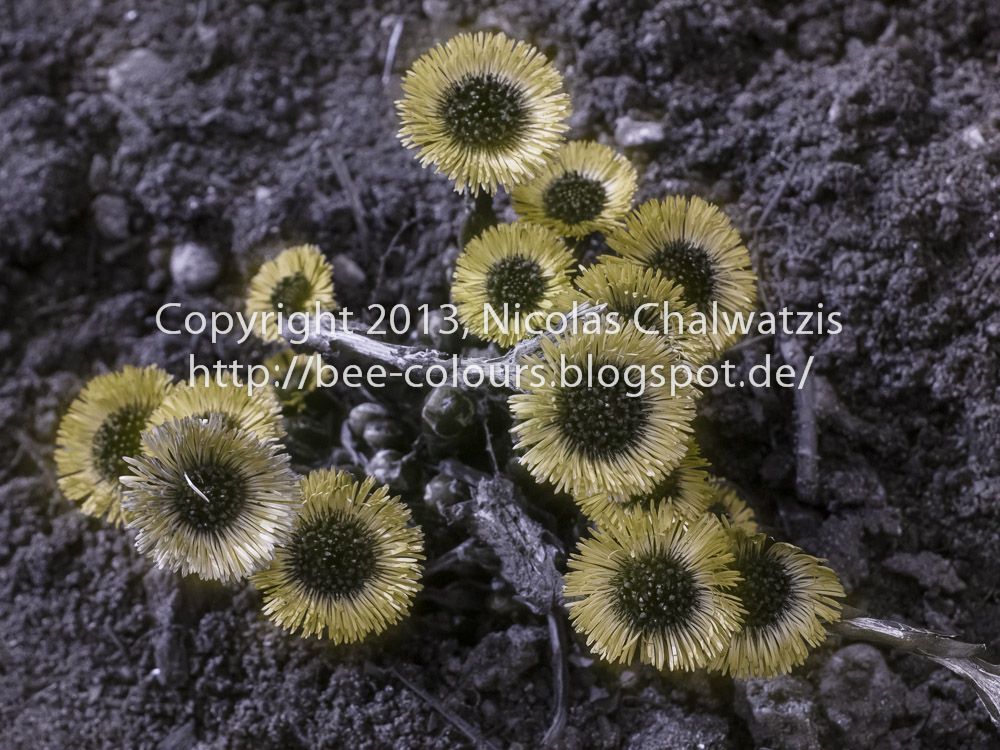
Next Coltsfoot (Tussilago farfara) in visible light:
And the UV-image (I had shown this before with the colour cast
introduced by the RAW conversion. See here: http://bee-colours.blogspot.de/2013/04/the-gear-i-use-for-uv-photography.html):
This is what I call “simulated bee-colours” for the Coltsfoot (Tussilago farfara):
In the examples above we have seen yellow flowers that also turn yellow
in the UV-photo. Now an example of the white flower of the Common Daisy (Bellis
perennis):
Interestingly, in the UV-shoot the petals turn blue:
Finally for today the blue flower of the Lesser Periwinkle (Vinca
minor), as we see it:
Below, the UV-photo of Vinca minor. The
petals appear in a blue, similar to the colour
that we see, but a bit darker. Note also that the background colours are very
different in this image:
The colours of the UV-photos are not (completely)
predictable, since some yellow flowers can appear entirely black and blue
flowers can have different intensities of UV reflections. The latter is also
true for white blossoms. However, until now I haven’t found a flower that we
see as blue which would turn yellow in the UV-image or vice versa.
I've posted some more examples here:
http://www.ultravioletphotography.com/content/index.php?/topic/258-white-balancing-uv-photos-in-lightroom/
I've posted some more examples here:
http://www.ultravioletphotography.com/content/index.php?/topic/258-white-balancing-uv-photos-in-lightroom/


No comments:
Post a Comment